
To install wood slat acoustic panels, first prepare and measure the surface, cut the panels to size, and then choose one of three fixing methods: screw them directly to a suitable wall, bond them with structural adhesive, or screw them to timber battens. For stronger acoustic treatment, add a framed cavity and sound-absorbing wool before fixing the panels through their felt backing.
This guide is for homeowners, fit-out teams, and interior contractors installing felt-backed wood slat panels on indoor walls or ceilings. It is based on the leeyinacoustic Installation Instruction of Wood Slat Panels and explains what the manual shows, what each method is best for, and which product-specific details must still be checked before work starts.
Key installation rule: The decorative face is not the fixing surface. Where screws are used, drive them through the black felt backing into a suitable wall, timber batten, or other approved substrate. For ceilings, use mechanical fixings; the leeyinacoustic manual specifically advises against a glue-only ceiling installation.
Table of Contents
- Choose the Right Installation Method
- Tools and Materials
- Pre-Installation Checks
- How to Install Wood Slat Acoustic Panels on Battens
- How to Maximize Sound Absorption
- Simple Direct-Fix Methods
- How to Install Panels on a Ceiling
- How to Cut and Join the Panels
- Common Installation Problems
- Frequently Asked Questions
Choose the Right Installation Method
A wood slat acoustic panel is a decorative slatted face attached to a flexible or semi-rigid acoustic felt backing. The felt provides the concealed fixing zone, while the timber slats create the linear finish. The wall, batten system, or ceiling structure behind the panel must provide the actual support.
The leeyin acoustic manual presents three installation routes. Select the route before ordering fixings or cutting panels.
| Installation method | Best for | Main benefit | Main limitation |
|---|---|---|---|
| Screw panels to timber battens | Uneven walls, concrete or brick substrates, walls and ceilings | Creates a level fixing grid and a concealed mechanical connection | Adds build-out depth and requires secure batten fixing |
| Battens plus sound-absorbing wool | Rooms where acoustic treatment is a priority | Adds an absorptive layer and cavity behind the decorative panels | Requires more materials, planning, and detailing |
| Direct screws or structural adhesive | Flat indoor walls and faster decorative installations | Uses fewer layers and can reduce installation time | Substrate and adhesive compatibility are critical; glue alone is not advised for ceilings |
This guide covers installation, not acoustic engineering or structural design. It does not establish a sound absorption rating, fire classification, fastener capacity, adhesive cure time, moisture suitability, or compliance with local building codes. Obtain those values from the exact panel, adhesive, insulation, fastener, and substrate documentation.
Tools and Materials
The leeyinacoustic manual illustrates the following tools and materials:
- Circular saw
- Electric drill or screwdriver
- Measuring tape
- Pencil
- Utility knife
- Screws
- Timber battens, called “wooden racks” in the manual
- Metal framing or keel components for the enhanced acoustic method
- Sound-absorbing wool
- Stapler
- Structural adhesive and applicator gun
- Optional wood closure strip for a finished edge

You may also need a level, straightedge, detector for concealed pipes and cables, fixings approved for the wall type, and personal protective equipment. When using a handheld circular saw, use the correct blade and guards and wear suitable eye and face protection, as described in the U.S. Occupational Safety and Health Administration handheld-saw guidance.
Product check: The manual shows the installation concept but does not specify screw diameter, screw length, wall-plug type, adhesive coverage, cure time, insulation density, or framing gauge. Do not guess these values. Match them to the panel system, wall construction, and local requirements.
Pre-Installation Checks
Complete these checks before cutting or applying adhesive.
1. Confirm the Installation Is Indoors
The leeyin acoustic manual labels the panel system “only for indoor” use. Do not extend that statement to bathrooms, exterior walls, humid rooms, or semi-outdoor spaces without separate written approval for the exact product.
2. Identify the Wall or Ceiling Construction
Determine whether the substrate is timber framing, plasterboard, concrete, brick, blockwork, or another assembly. The manual notes that screwing panels directly to concrete or brick can be difficult and recommends adding a batten layer for a more secure installation.
Battens do not eliminate the need for correct substrate fixings. Each batten must first be anchored to the structural wall or ceiling with hardware approved for that material.
3. Inspect and Prepare the Surface
The surface should be clean, dry, and free of protruding nails and screws. Remove loose coatings, dust, debris, and obstacles that would prevent the panels or battens from sitting flat. Resolve dampness or substrate damage before covering the wall.
4. Measure the Full Area
Measure the height and width at several points, especially on older or uneven walls. Record the positions of corners, doors, skirting, sockets, switches, vents, and ceiling transitions. Plan which edge will receive the first full panel and where a narrower cut panel will be least visible.
5. Verify the Panel Size
The leeyin acoustic manual illustrates panels in 2400 mm, 2700 mm, and 3000 mm lengths. Verify the actual length, width, slat spacing, felt overlap, and grain or color sequence of the panels delivered to your project. Do not cut from the manual’s illustrated dimensions alone.
6. Dry-Lay the First Two Panels
Place the first and second panels together without fixing them. The manual says the felt edge of one panel should meet the slat edge of the next panel seamlessly. A dry layout confirms the correct orientation and helps prevent an obvious wide or narrow joint.
How to Install Wood Slat Acoustic Panels on Battens
The standard leeyin acoustic method uses timber battens as the underlying fixing system. This is a practical choice when the wall needs leveling, the substrate is masonry, or the panels will continue onto a ceiling.
Step 1: Prepare the Wall or Ceiling

Clean and dry the surface and remove protruding nails, screws, or other obstacles. Mark the intended panel area and locate any structural fixing zones, pipes, and cables before drilling.
Step 2: Measure the Height and Width

Measure the installation area and transfer the final dimensions to the panels. Check whether the floor or ceiling is out of level. If it is, plan the first cut so the visible slats remain vertical and the top and bottom edges finish cleanly.
Step 3: Cut the Panels

Mark the cut line on the face and felt backing. Support the panel on a stable work surface. Cut the wood slats with a suitable circular saw and trim the felt with a sharp utility knife, following the tool and panel manufacturers’ instructions.
Use a test offcut to confirm the blade direction and finish before cutting a full panel. Protect the visible face from scratches and keep hands clear of the cutting path.
The leeyin acoustic standard-method diagram recommends placing the timber battens at 600 mm intervals on the wall or ceiling. Mark the fixing positions with a pencil, level the battens, and secure them to the substrate with suitable screws and anchors.
Treat 600 mm as a source-manual layout, not a universal engineering rule. Reduce or change the spacing if required by the actual panel instructions, load, ceiling design, wall condition, or local code. The Wood Veneer Hub installation library also directs installers to use the technical sheet for the exact panel range, reinforcing the need for product-specific instructions.
Step 5: Fix the First Panel Through the Felt

Set the first panel plumb and in the correct orientation. Drive the screws through the black felt and into the timber battens so the fixings remain visually discreet between the slats. Confirm the panel is straight before installing the remaining screws.
Do not drive screws through the decorative slats unless the panel manufacturer expressly requires it. Avoid overtightening, which can crush the felt, distort the panel, or pull the slat alignment out of plane.
Step 6: Join the Next Panel

Bring the felt edge of the installed panel together with the slat edge of the next panel. Check that the slat rhythm and joint spacing remain consistent from floor to ceiling. Recheck plumb every few panels instead of relying on the previous edge alone.
Step 7: Finish the Exposed Edge

If the last felt edge or cut edge remains visible, fit a matching wood closure strip or trim. The UNIKOO manual shows a closure strip as an optional aesthetic finish. Verify whether the trim is mechanically fixed, bonded, or supplied as part of the panel system.
How to Maximize Sound Absorption
For its higher sound-absorption installation, the leeyin acoustic manual adds framing and sound-absorbing wool behind the wood slat panels. This creates a layered assembly rather than placing the felt directly against a solid wall.
Step 1: Prepare the Surface

Start with a clean, dry wall or ceiling. Mark the finished panel area, structural fixing positions, service routes, and perimeter details.
Step 2: Build the Framed Cavity

The manual shows metal keel members and timber battens forming a grid, with 600 mm dimensions indicated in the drawing. Secure the framing system to the building structure using compatible fixings. Keep the frame flat so the installed slats do not develop waves or stepped joints.
Step 3: Insert Sound-Absorbing Wool

Place the sound-absorbing wool between the framing members without leaving unintended gaps. Do not compress, substitute, or expose the material unless its manufacturer permits that method. Coordinate the insulation with fire, indoor-air, and handling requirements for the project.
Step 4: Fix the Panels to the Timber Battens

Use an electric screwdriver to drive screws through the black felt into the timber battens. Join each felt edge to the following slat edge, maintain the visual spacing, and complete the wall before continuing across the ceiling.
This arrangement is the manual’s enhanced acoustic method, This is a method Leeyin has accumulated from hundreds of projects, designed to improve sound absorption. It is not a soundproofing solution, but rather an effective way to enhance speech clarity in indoor settings and reduce sound reflection.Learn more about Acoustic Knowledge
Simple Direct-Fix Methods
When the wall is flat, dry, clean, and compatible with the chosen fixing, the panels may be installed without battens. The manual presents two direct-fix options.
Option 1: Install With Structural Adhesive

- Remove loose material, dust, protruding nails, and screws.
- Measure the wall and cut the panel to the required size.
- Apply a compatible structural adhesive to the black felt backing using the pattern and coverage required by the adhesive manufacturer.
- Position the panel, check it is plumb, and press it evenly against the wall.
- Support or brace the panel for the full cure period if required by the adhesive instructions.
The leeyin acoustic manual warns that uneven adhesive or poor-quality glue may cause the panel to warp. Adhesive compatibility, coverage, open time, cure time, and temporary support are product-specific; follow the adhesive technical data sheet rather than inventing a bead size or waiting period.
Adhesive can also make later removal more destructive. If the wall may need access, repainting, or panel replacement, a batten-and-screw installation is usually easier to service.
Option 2: Install With Screws
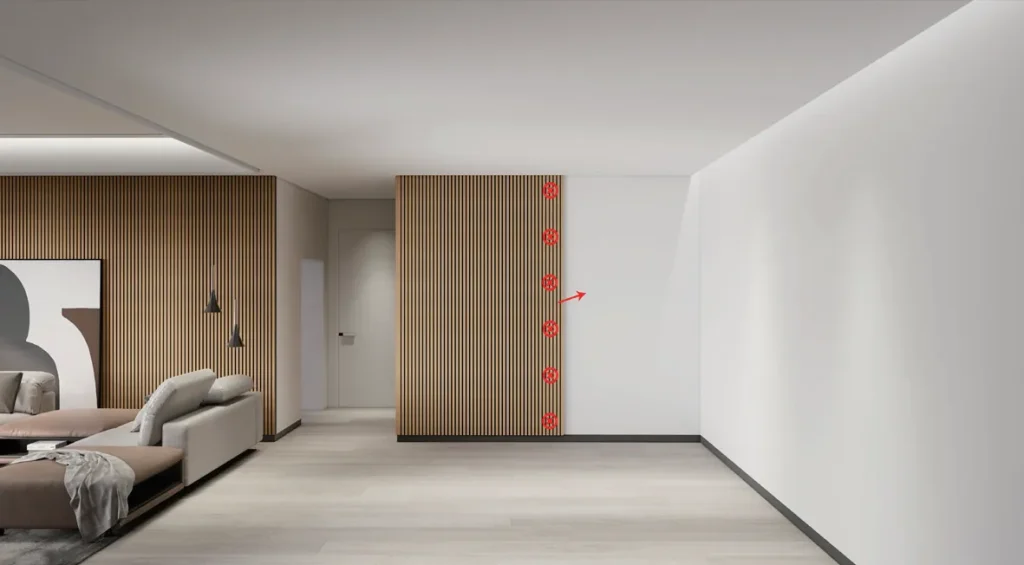
- Clean and dry the wall.
- Measure and cut the panel.
- Mark the fixing points through the black felt.
- Confirm that each fixing enters a suitable structural point or approved wall anchor.
- Hold the panel plumb and install the screws through the felt.
Direct screws are only as reliable as the substrate and anchors behind them. Do not assume that a screw through felt into unsupported plasterboard is suitable. A comparable manufacturer guide from Barron Designs likewise separates direct adhesive, direct screw, and furring-strip methods, with substrate-specific anchoring required.
How to Install Panels on a Ceiling
The panel layout can continue from a wall onto a ceiling, but overhead work requires a more conservative fixing plan. The leeyin acoustic manual states that the basic instructions are similar to wall installation while recommending additional mechanical fixing.
Its illustrated fixing pattern shows:
- Wall: 15 screws per panel, arranged as 3 screws across each of 5 rows.
- Ceiling: 25 screws per panel, arranged as 5 screws across each of 5 rows.
These are the manual’s illustrated recommendations for its panel system, not a universal fastening schedule. Confirm panel dimensions, screw capacity, framing spacing, ceiling structure, seismic requirements, and local code before adopting the pattern.
The manual explicitly advises against attaching ceiling panels with glue alone because uneven application or poor adhesive quality can allow warping. Fix ceiling panels mechanically into an approved structural or batten system, and use adhesive only if the exact panel and adhesive instructions allow it as a supplementary method.
How to Cut and Join the Panels
Clean cutting and consistent joints determine whether the finished wall looks deliberate.
Cutting Across the Slats
Use a suitable saw to cut through the slats and backing across the panel width. Support the full panel, mark a square line, and test the blade on an offcut. A clean, controlled cut reduces veneer chipping and prevents the flexible felt from pulling the panel out of line.
Cutting Along the Panel
Where possible, cut the felt between slats with a sharp utility knife. If the final width runs through a slat, follow the panel manufacturer’s cutting method and plan an edge trim to conceal the cut.
Joining Panels
Match the exposed slat edge of one panel to the felt return of the next. Check the slat spacing at the top, center, and bottom before fixing. Small alignment errors can accumulate across a wide feature wall.
Working Around Sockets and Switches
Isolate the electrical circuit and have fixed wiring altered by a qualified electrician where required. Measure the opening from a fixed reference point, transfer it to the panel, and cut the felt and slats with tools appropriate to the shape. Do not bury junctions or reduce the safe mounting depth of an electrical accessory.
Common Installation Problems
The First Panel Is Not Plumb
If the first panel leans, every following slat will repeat the error. Stop, release the panel before the adhesive cures or remove the temporary screws, establish a vertical reference with a level, and refit it. Do not try to hide a major lean by changing each subsequent joint.
The Wall Is Concrete or Brick
Do not rely on ordinary direct screws. The leeyin acoustic manual recommends an additional batten layer for solidity on concrete or brick. Select masonry anchors for the actual base material, securely fix and level the battens, then attach the panels through the felt.
The Panel Is Bowing After Adhesive Installation
Possible causes include uneven adhesive, an incompatible or poor-quality product, an unprepared wall, or inadequate support during curing. Follow the adhesive manufacturer’s instructions and stop installing additional panels until the cause is corrected.
The Joints Look Too Wide or Too Narrow
Check the orientation of the felt overlap and exposed slat edge. Dry-fit two panels, then make sure the felt edge of one panel meets the slat side of the next. Recheck the first panel for plumb and inspect whether a cut edge was accidentally used as a factory joint.
The Slat Ends Look Unfinished
Use a compatible wood closure strip or trim where an edge is visible. Plan the trim thickness before setting the first panel so the finished width does not create an awkward narrow strip at the opposite end.
The Ceiling Panels Depend on Adhesive Alone
Stop and add an approved mechanical fixing system. The source manual does not recommend glue-only ceiling installation and illustrates a denser ceiling screw pattern than the wall pattern.
Installation Checklist
Use this copyable checklist before and during the project.
Before Installation
- [ ] Confirm the product is approved for the intended indoor room.
- [ ] Identify the wall or ceiling construction.
- [ ] Check for concealed cables and pipes.
- [ ] Verify the actual panel dimensions and batch appearance.
- [ ] Obtain the correct screws, anchors, battens, adhesive, and insulation specifications.
- [ ] Measure the area at multiple points.
- [ ] Plan factory joints, cut edges, trims, sockets, and corners.
- [ ] Dry-fit the first two panels.
- [ ] Read the saw, adhesive, and fastener safety instructions.
During Installation
- [ ] Keep the first panel plumb.
- [ ] Keep battens level and flat.
- [ ] Use the required batten spacing for the exact system.
- [ ] Drive screws through the black felt where specified.
- [ ] Avoid crushing the felt or deforming the slats.
- [ ] Match each felt edge to the next slat edge.
- [ ] Recheck alignment every few panels.
- [ ] Use mechanical ceiling fixings.
Before Handover
- [ ] Confirm all panels and trims are secure.
- [ ] Check joints from several viewing angles.
- [ ] Verify access to sockets, switches, and service points.
- [ ] Remove cutting dust and adhesive residue safely.
- [ ] Record the panel, adhesive, insulation, and fastener products used.
- [ ] Keep the installation and maintenance documents for future work.
Frequently Asked Questions
What is the best way to install wood slat acoustic panels?
For a serviceable installation and a more controlled fixing surface, screw the panels through their felt backing into properly secured timber battens. Direct screws or structural adhesive may suit a flat indoor wall, while a framed cavity with sound-absorbing wool is the source manual’s preferred route when acoustic treatment is the priority.
Can wood slat acoustic panels be glued directly to a wall?
Yes, the leeyin acoustic manual allows structural adhesive on a clean, dry, compatible wall. Apply it evenly to the black felt and follow the adhesive manufacturer’s coverage and curing instructions. Because the manual warns that uneven or poor-quality glue can cause warping, do not use an unspecified adhesive or guess the application pattern.
Can I screw acoustic slat panels directly into plasterboard?
Only if the exact panel instructions and chosen anchors approve that wall construction and load. A screw passing through the felt does not automatically make the substrate suitable. Where reliable fixing points are unavailable, install a properly anchored batten or backing system rather than relying on unsupported plasterboard.
How far apart should the timber battens be?
The leeyin acoustic installation diagrams show timber battens at 600 mm intervals for the standard and enhanced acoustic methods. Treat that measurement as product-manual guidance, not a universal rule. The panel size, orientation, substrate, ceiling load, and local requirements may call for different or closer spacing.
How many screws are needed per acoustic slat panel?
The leeyin acoustic manual illustrates 15 screws per wall panel and 25 screws per ceiling panel. These figures belong to the documented panel system and layout. Confirm the fixing schedule for the exact panel dimensions, framing pattern, substrate, screw type, and installation location before using those quantities.
Can wood slat acoustic panels be installed on a ceiling?
Yes, but use a mechanically secured batten or structural fixing system. The leeyin acoustic manual shows 25 screws per ceiling panel and warns against a glue-only ceiling installation. Because overhead failure creates a serious hazard, have the ceiling structure and fixing method checked whenever the substrate or load path is uncertain.
Do I need insulation behind wood slat acoustic panels?
Not for every decorative installation. The panels may be attached directly to a suitable wall or fixed to timber battens. When increased sound absorption is the goal, the leeyin acoustic manual shows sound-absorbing wool inserted within a framed cavity before the panels are screwed to the battens.
Are wood slat acoustic panels soundproof?
Do not describe them as soundproof without tested assembly data. The leeyin acoustic manual provides installation options intended to increase sound absorption but does not publish a decibel reduction, transmission-loss value, or laboratory comparison. Use verified acoustic test reports when making performance claims for a specific wall or ceiling assembly.
Conclusion
The correct way to install wood slat acoustic panels depends on the substrate, location, and acoustic objective. Direct adhesive or screws can suit a clean, flat indoor wall; timber battens provide a more controlled fixing base; and a framed cavity with sound-absorbing wool creates the manual’s enhanced acoustic assembly.
Whichever method you choose, measure before cutting, keep the first panel plumb, join the felt edge to the next slat edge, and use mechanical fixings for ceilings. Before starting, confirm every missing engineering detail – including anchors, screw size, adhesive specification, fire requirements, and framing capacity – against the exact product documents and local rules.


